For this week’s Self Reliant Skill of the Week, I learned how to crochet. I have fond memories of my mother-in-law crocheting for hours, making all kinds of blankets and afghans for all of the kids and grandkids. But for some reason, I just never learned it for myself. Until now!

Crochet is a great way for the modern-day homesteader to make their own blankets, pot holders, hats, mittens, slippers, scarves, and so much more. For just the cost of the yarn and your time, you can make your own things. This makes crochet a great thing to learn!
The history of crochet
Crochet has been around for hundreds of years. The word crochet comes from the Middle French word croc, or croche, which means hook.
No one really knows for sure when and where crochet originated. According to Annie Potter, American Crochet expert and world traveler, “The modem art of true crochet as we know it today was developed during the 16th century. It became known as ‘crochet lace’ in France and ‘chain lace’ in England.”.
There are theories about crochet originating in Arabia, in South America, or in China. There is some evidence that crochet was around as far back as the 1500’s in Italy, where it was called “nun’s work” or “nun’s lace”. But none of these theories have been proven.
One of the main predecessors of crochet was called tambour. Tambour was the art of stretching fabric onto a frame, and using a needle with a hook to pull thread up through the fabric. This technique evolved into what the French called “crochet in the air” at the end of the 18th century.
Regardless of its age and origin, crochet has been a very important handiwork for a very long time.
Basic crochet stitches
With just a few basic stitches, you can create all kinds of beautiful things. Learn each stitch one by one, and practice each until you get it down solid.
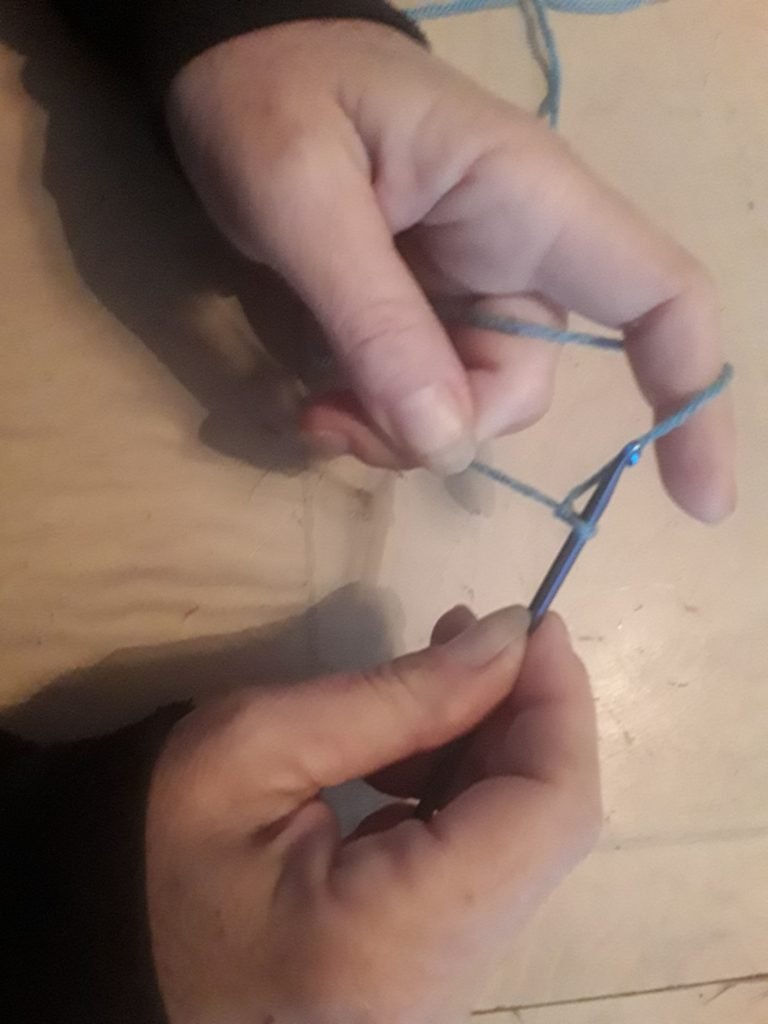
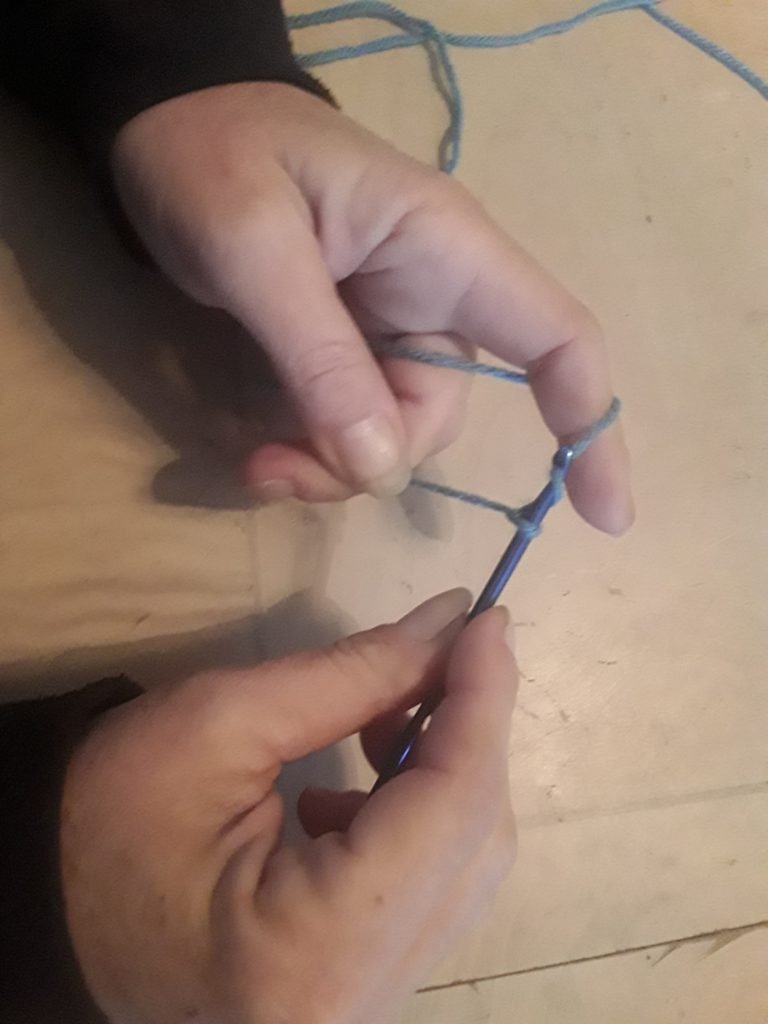
Slip knot
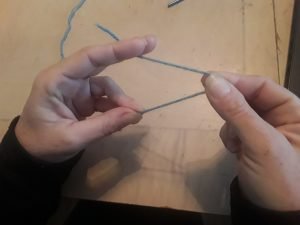
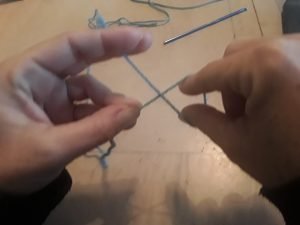
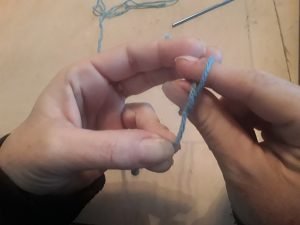
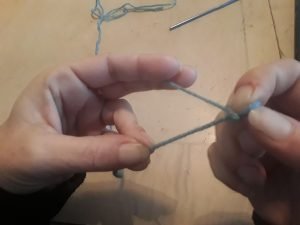
The first thing you need to know how to do is the slip knot. Hold the string in a v-shape between both hands. With your right index finger and thumb, turn the thread so it makes an X. Grab the short end of the string with your right thumb and index finger, and pull through, leaving a tail, as shown in the pictures.
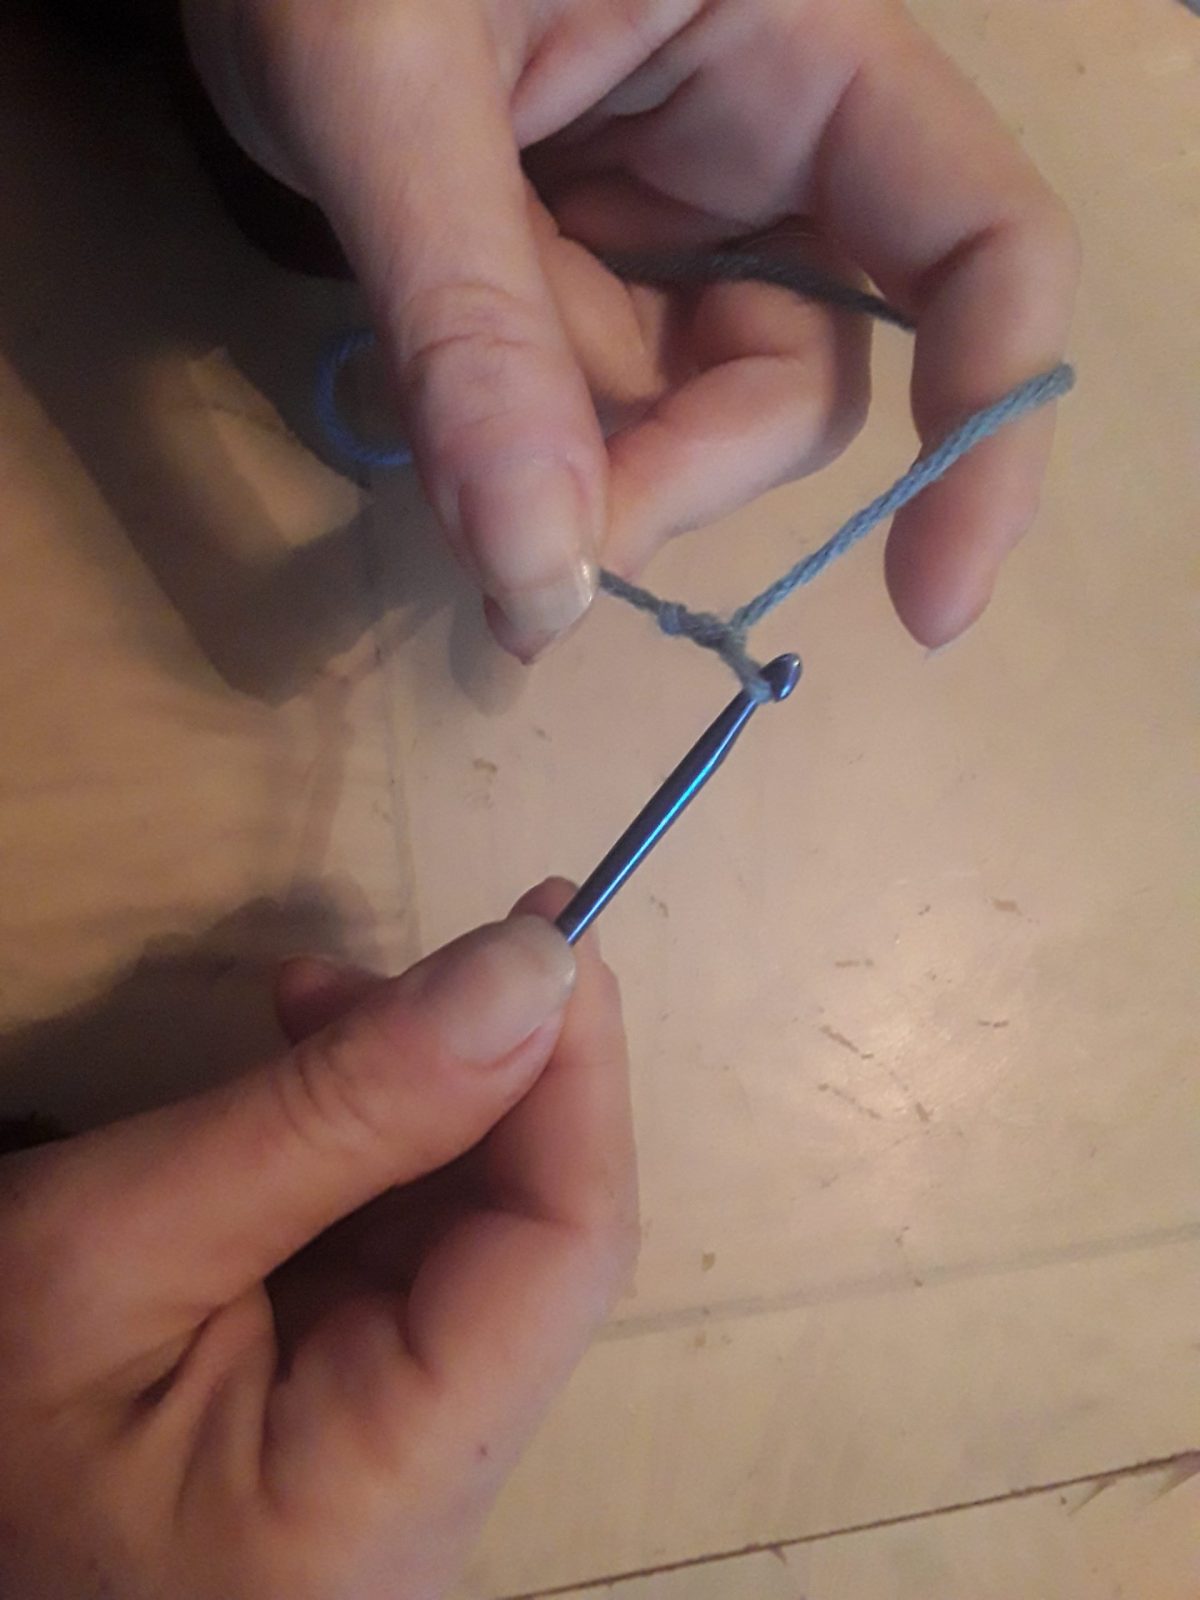
Chain stitch
Insert your crochet hook into your slip knot, holding the long end of the string in your left hand. Take the hook up and to the left of the working yarn, and hook it. This is called “yarn over”. Then bring the crochet hook down, and slip through the slip knot, allowing the loop of the slip knot to slip off of the crochet hook. This is your first chain.
Continue this until you’ve made as long of a line as you need. This is your chain. See pictures below.


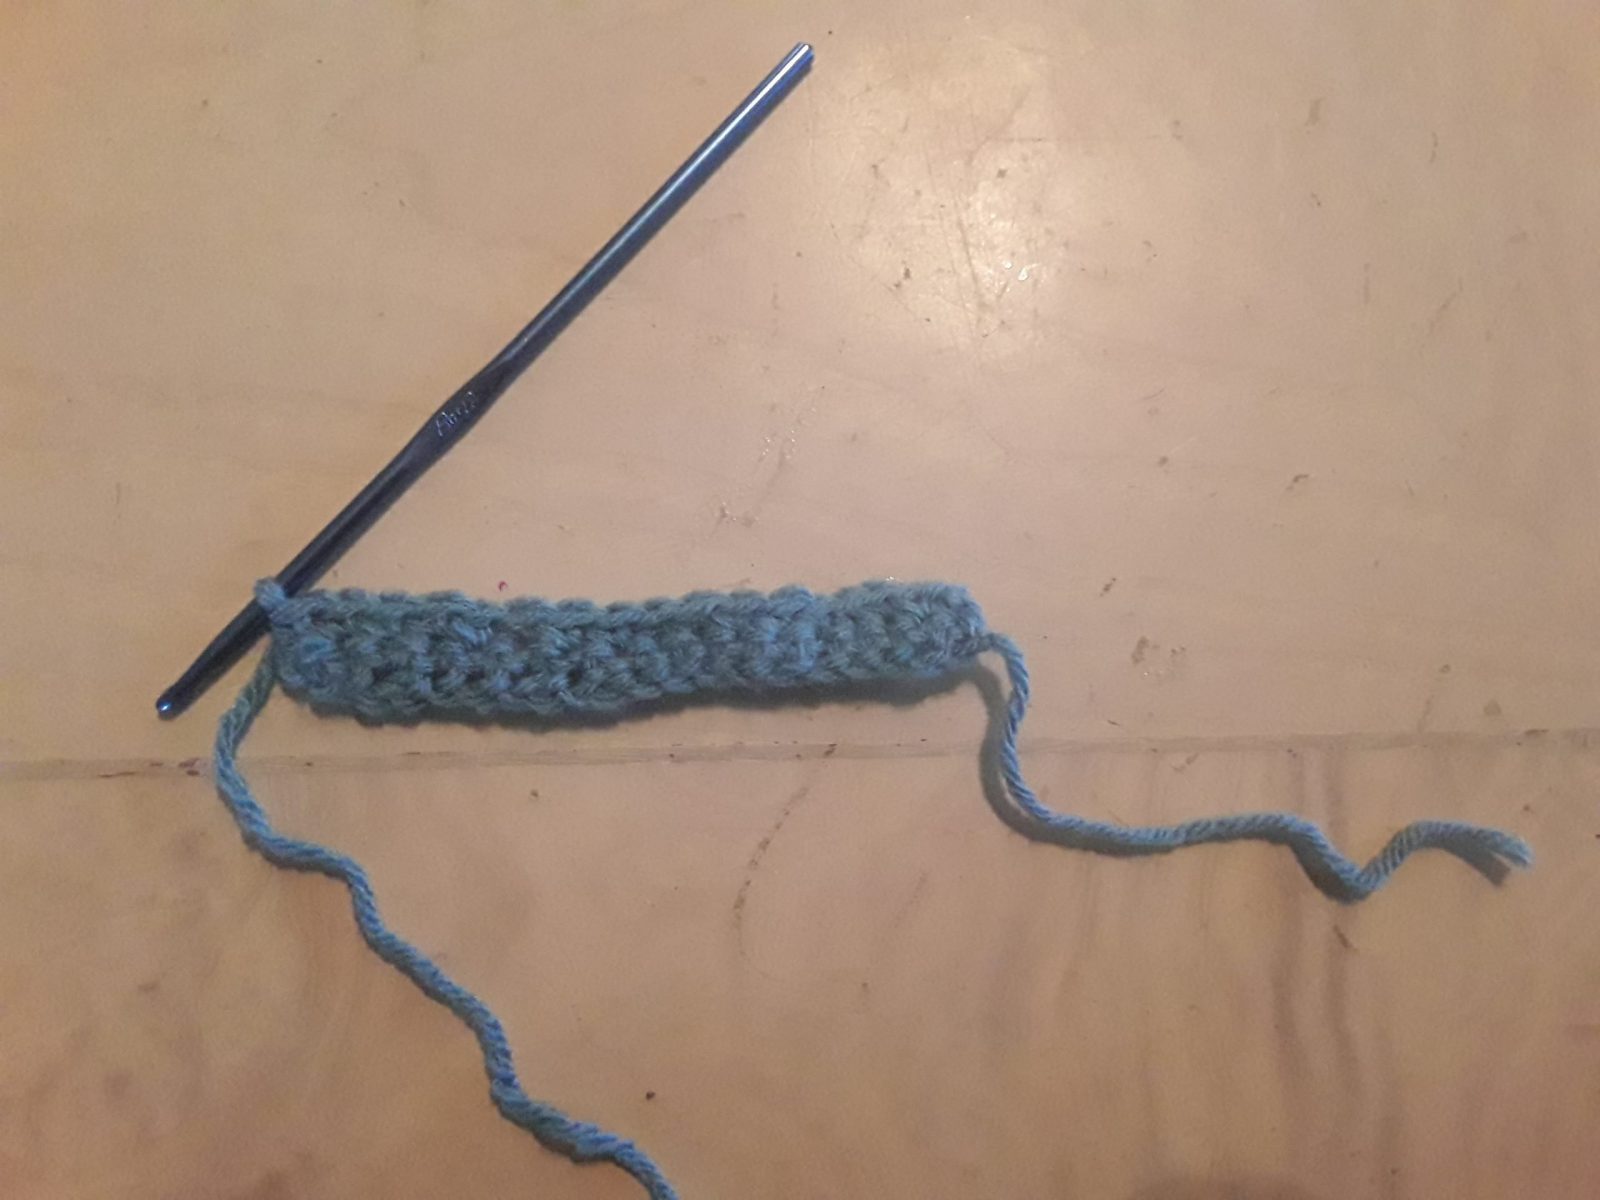
Single crochet
When you’ve come to the end of your chain stitch, flip your work to the other side. Your work should always be going towards your left hand. Insert your hook into the next V, then bring it back up to the left of the working yarn. Hook the working yarn, then bring it back through the hole you just inserted into. You will then have 2 loops on your crochet hook. Hook the working yarn again, and bring your hook through both of those loops. That is your first stitch.
Continue this until the end of your line again, then do a single chain stitch, flip your work again, and do that line. It should look similar to this when you’re done with 3 rows of single crochet. Hopefully yours will be a little more uniform, though!
There are a lot more basic stitches, but since I’m just learning myself, these are all that I know. If you want to try this new skill yourself, I would suggest turning to a pro. YouTube is a great teacher if you can’t find one nearby.
Here is my YouTube video on my experience with crochet. It shows how to do it much better than I can describe in writing! Like and subscribe to my channel if you want to get notified of future videos!
How to learn to crochet
If you have a mom, grandma, or aunt that loves to crochet, ask them to teach you! It’s a great way to learn this new skill, and spend quality time with your loved one.
If you’re not blessed to have an elder in your family, why not go to the local nursing home and make a new friend? They might be able to teach you as well.
There are also lots of younger people who are learning to crochet. Check out some Facebook groups to see if there’s a group near you.
And, if all else fails, YouTube is a great resource to learn all kinds of new stuff!
If I can give you some advice, it would be to not learn from more than one person. While I was trying to learn to crochet this week, I had my daughter trying to teach me, The Hubs trying to show me, and YouTube running in the background. It got so confusing! So just pick one method – and one teacher.
Take your time and learn each basic stitch. Try to master each one, before you try a different one. Buy a few beginner patterns and learn how to read them. Your options will be endless with these skills!
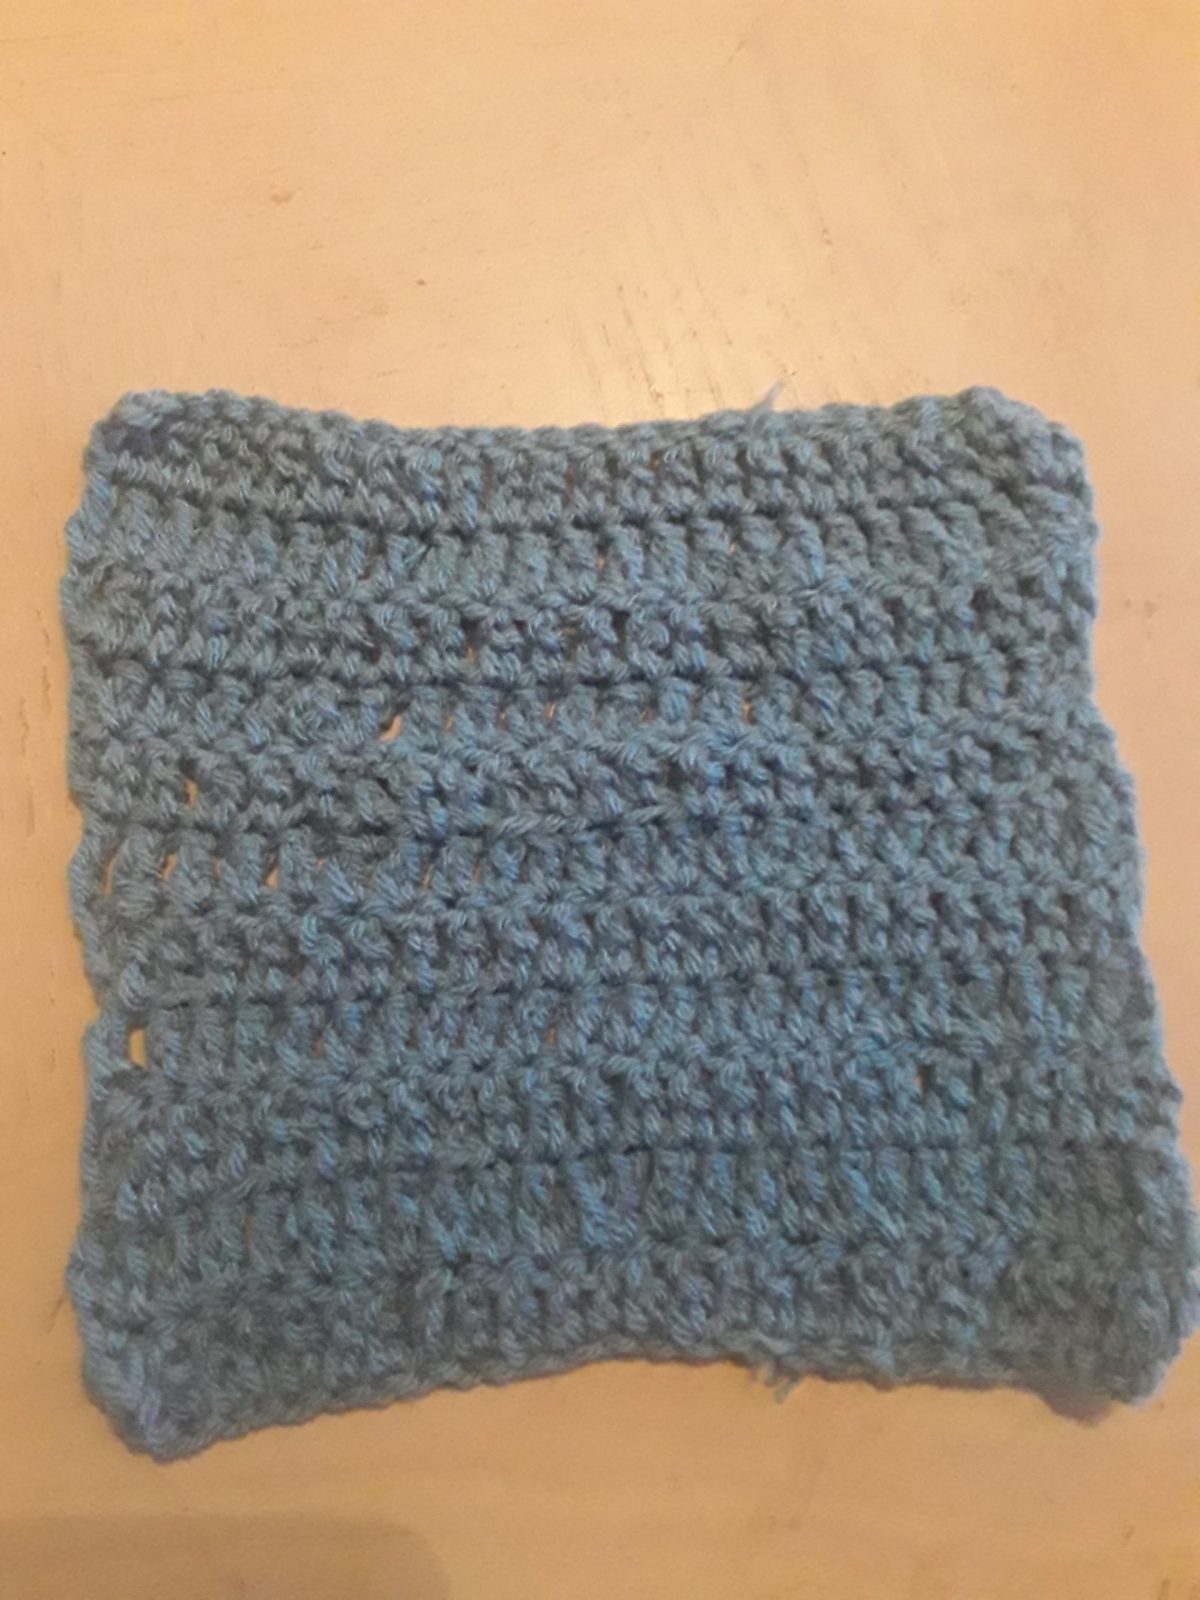
My lovely daughter, bless her heart, had me do a pot holder in a stitch that looked totally different than the ones I had seen on YouTube. I ran with it and followed her instructions, but it didn’t turn out too good. I then accused her of making up the stitch. She then admitted to me that she may very well have made up this stitch. We now lovingly refer to it as the “Dani Double” stitch. This is the pot holder that we finished using the “Dani Double” stitch. It’s pretty, but definitely not perfect!
I hope you’ll consider learning to crochet. It is a great skill that should be passed from generation to generation.
This post may be shared on Family Homesteading and Off The Grid Blog Hop, Simple Homestead Blog Hop, Farm Fresh Tuesday, and Old Paths to New Homesteading & Self-Reliant Living.


